DIY Barndominium: Your Barndo's Rough In Work
Everything You Need to Know
About DIY Barndonimium Rough-In-Work
Installing HVAC
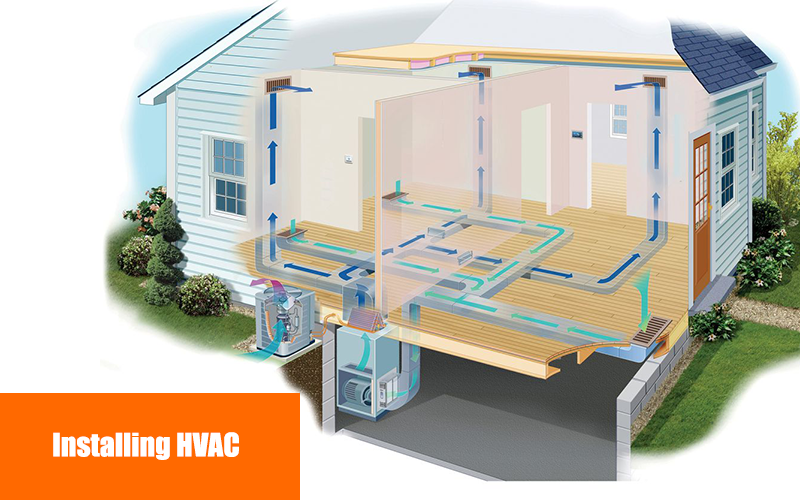
You have to prioritize getting the HVAC you will need in the electrical aspect. HVAC covers all things related to Heating and Ventilation. At the same time, it also covers Air Conditioning which you will indeed need in the long run. You need proper heating and ventilation depending on where you will build your Barndo, and of course, you need good air conditioning because it can be too hot inside when you don’t have one.
A Barndonimium’s ceiling is built taller and higher than usual houses to circulate more air inside the room. In hindsight, you can also opt for a loft-style as your second floor so that the first floor feels and looks wider. However, this design affects the overall durability and functionality of HVAC, for sometimes, HVAC’s can only cover a small space at a time. That’s why installing multiple HVAC systems (different from the first floor to the second floor) can be a good option, or you can design a soffit so that every function of an HVAC can cover the whole house.
Part of an HVAC is also the insulation. In installing HVAC, we also prioritize that the insulation works well with it. Even if it is a DIY Barndo, we must follow the International Residential Code. Since this is a barn (that is mainly made from wood), thicker insulation should be installed. The thicker insulation would also help to make the Barndo safer for everyone.
We can also install big and accessible windows within the first and the second floor of the Barndo. In this way, you will have easy access to natural sunlight and natural air from the outside. All these windows are made to still support a barn’s overall design.
Installing the Plumbing System
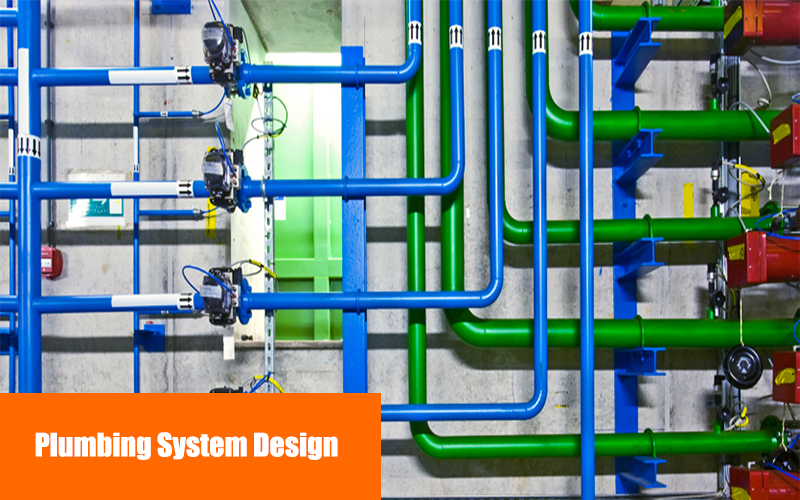
Plumbing is also one of the most challenging aspects of rough-in-work we did for a DIY Barndonimium. In this area, we had to install the right plumbing system that can provide water to the whole house and, at the same time, make the drainage system work and be durable.
Before this stage, you have the liberty to choose what kind of bathtub you want for your bathroom (or if you don’t like one). However, for us, both bathtub and showerheads should be priorities for making the Barndonimium more appealing.
To do this, we will need strong support that can hold the pipes and withstand the water pressure. Since we are still talking about a barn turned into a house at the end of the day, if we are going to look at the structure of a barn, installing the pipes under the pre-existing frame can cause harm to the overall structure of the plumbing system.
In a DIY Barndonimium, we experienced that it is not relatively safe to stick to what was already built beforehand. That’s why this time, we advise that when installing the plumbing system, you have to build a supporting frame to the existing frame of the barn. In this way, it will secure all your pipes in the long run.
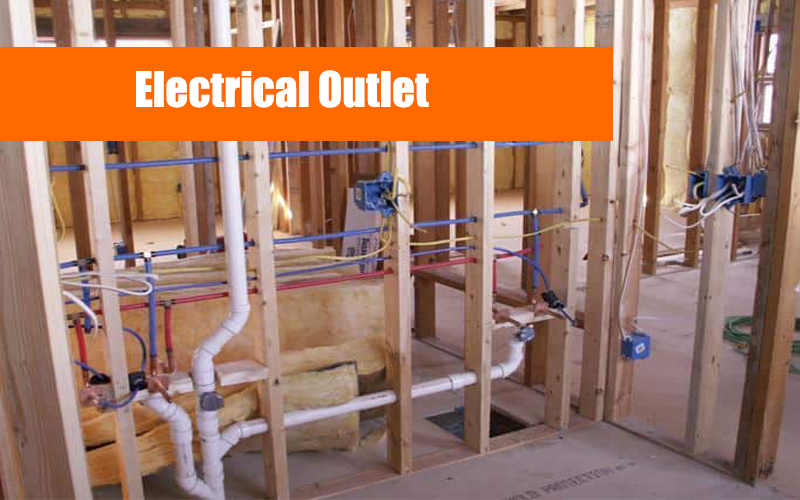
Installing the Electrical System
Since technically, barns do have an electrical system even before turning it into a house, this rough-in-work can be easy to do. However, since this is still a barn, we have to be careful about how electrical wirings can be exposed to harsh temperatures if the work is not polished.
That is why HVAC is important. But beyond that, any traditional electrical system can work in a Barndoinium. For a DIY Barndonimium, we also advise using pipes that can cover the wiring inside the framing. This way, the wires will not expose the wood framing of the house directly, and you can still retain the overall design of the barn.
In installing the electrical system, we also must consider getting it underground to connect to other parts of the Barndo as well. That stage is also easy, but as much as possible, connecting it to the frames is the viable choice.
The Costs and Time and DIY Barndonomium
Overall, since this is a DIY Barndonomium, we have to make sure that every structure of the barn (before we turned it into a Barndo) remains. That is why in costing, you can save a lot of money, especially if you opt to DIY Barndonomium.
However, it is still time-consuming. Although the structure is already there, many adjustments have to be made to make the space livable and safe. Despite its tediousness, the time and effort given for DIY Barndo are worth it can live up to every house that you dream and desire.
